DVD Review- Konstantin Sterkhov's "Reflections"
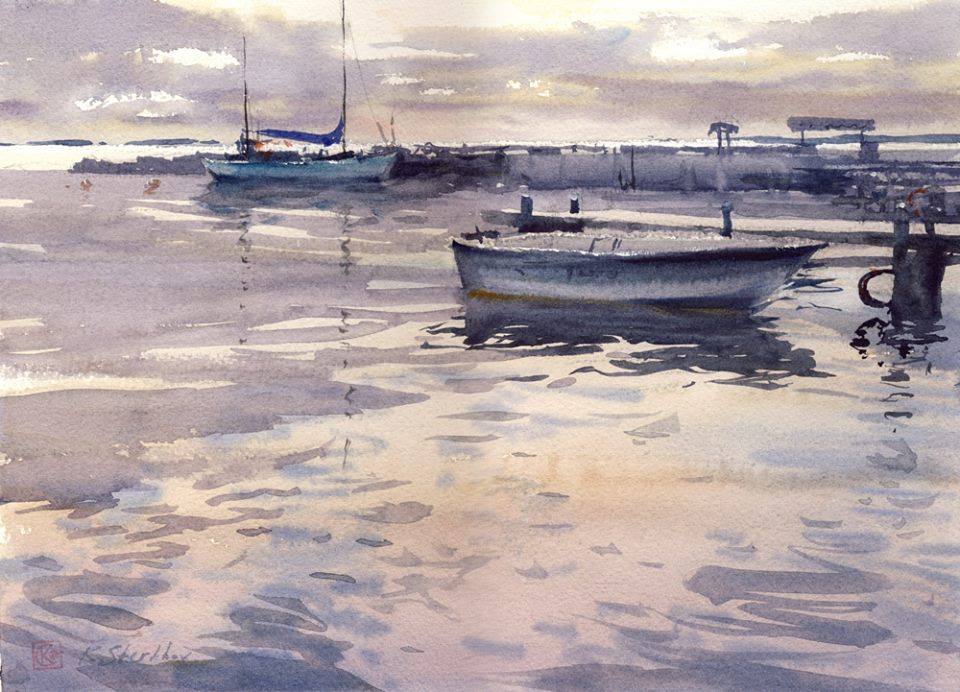
Konstantin Sterkhov (from the Art of Watercolor blog) has recently produced a series of educational videos available on Vimeo. Today I'm reviewing one of them- "Reflections", pictured above.
In a gist, there's a number of things to like about it. I like the image itself, production values are good, the music is culturally diverse, etc. Plus, well... the price is right, at 4$ to rent it for 24 hours, or 8$ to buy it. I've not understood APV video, and how they're charging a full 35$ to stream their videos online on Vimeo. That's crazy to me, particularly if I just want to rent it and watch it once or twice. So Konstantin's price-point is right for what he's offering.
Additionally, the videos dedicate a good amount of time to a single painting. This one is 35 minutes, and another is almost 40. In the past, when I've watched most painting videos, I've always wanted more time dedicated to each painting. This video delivers on that. I asked Konstantin about it, and he said the only editing done was for blow drying. So, the painting definitely took longer than 35 minutes to do, but honestly, probably not that much longer! Most of it is there for us to watch. The editing process may not be as sexy, but it's easier to learn from the video when less is edited out. When you can see all the parts more clearly, the video becomes less of a performance and more of an opportunity to watch a professional work through an image, stage by stage. Of course, Konstantin has good control of his tools, his wet into wet work is smooth, etc. etc, but these are things we all expect to see. What is often the hardest for a new learner to wrap their heads around, and the real gem that is hiding in these longer unedited videos, is the "logistics" of building the painting. As learners, we have the opportunity to see him intentionally do one stage after the other, layering a darker value on top of another, doing this section wet into wet, but that other section wet on dry, etc etc. So, the added length is a boon for its educational value. Let's dive in to the video itself.
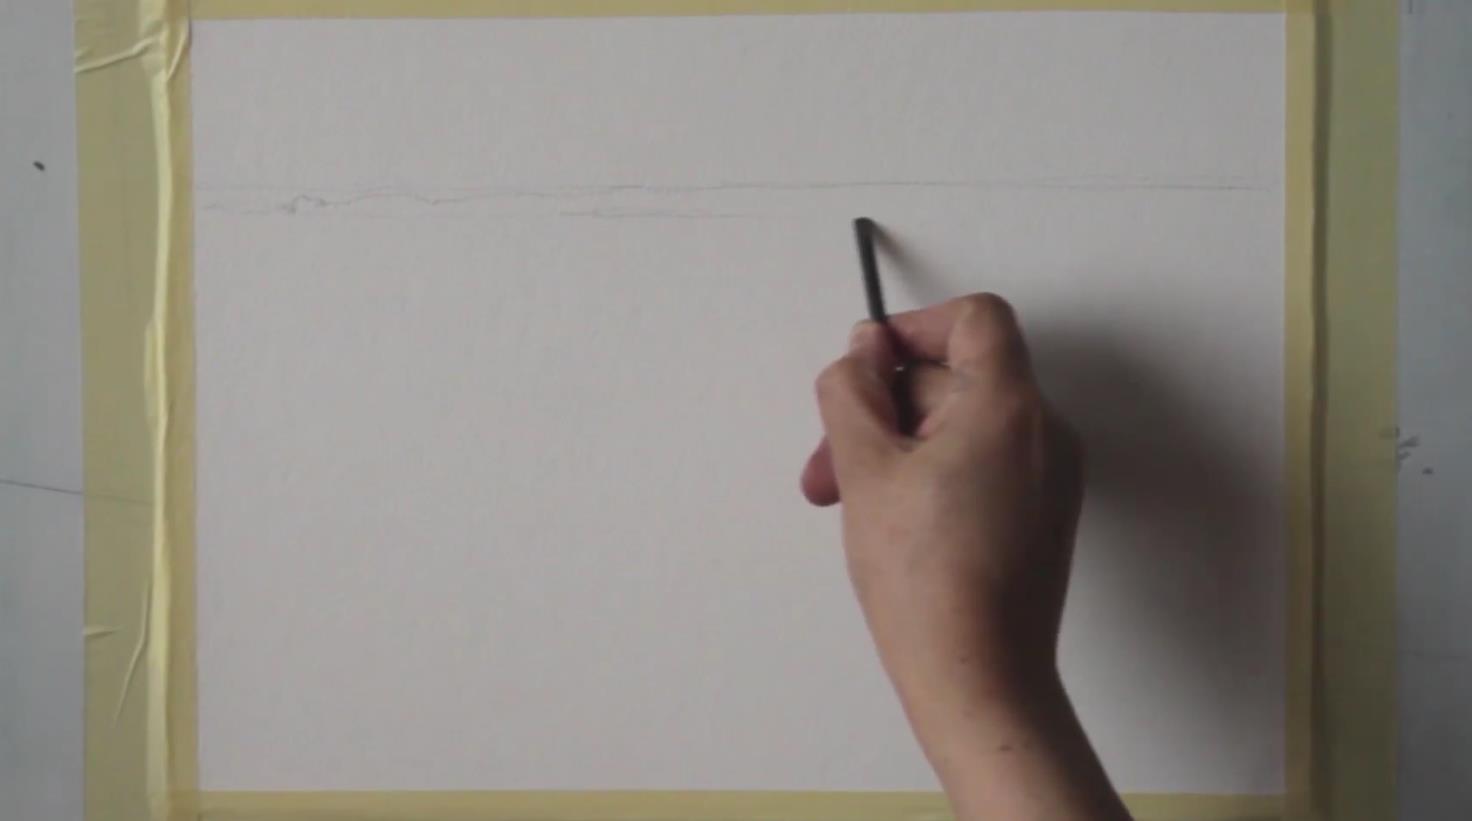
Things start out with the sketch, which goes for over 5 minutes. This is one of those details that often gets edited down, but with 35 minutes in total, we get to see the full process. I also like this lead stick (?) he is using. I've not seen anyone sketch like this before, except Chien Chung Wei. Nice fluid lines, and the ergonomics of the position seem to allow for a full range of motion. No one really wants to hear it, but, yes, you need to be able to draw and understand perspective before you can really get down to painting! It makes the painting part so much easier. He makes the process look easy! :)
He moves into the sky first for the next 5 minutes, laying in some water, then dropping in his light values, and then his darker values, wet into wet. It's all very loose and moody, with dark clouds trapping and holding on to the light. Note how he takes it down only to the horizon. This allows him to divide the painting up into different spaces geographically and "contain" his wet into wet cloud shapes.

He switches to a Squirrel Mop for the water's base coat- best for sloppy, loose washes. This goes for the next 5 minutes, as he moves from one color into the next. Something he doesn't mention but is worth bringing up, is how much the colors dull out as they dry. Experienced painters know this, but it can be a surprise to novice ones. Watch the hues he lays down for the water when they are fresh, and then note, later on, how much more muted they are when they've dried. It's not necessarily bad, nor good, it just is- but you need to be prepared for the shift.

Part way through, they make a cut, which allows for the water to dry. You can see the shift in tone on the paper, when it happens around 11:45. Sneaky! These little breaks happen now and again over the course of the video. You can tell they're sometimes happening when they switch the view of his palette.

The next 5 minutes mark the beginning of the 2nd layer- all his darks which he'll begin laying down on top of those first washes. Here he switches to his Roubloff brush. It's a synthetic/sable mix, and has a stiff fine point. As Konstantin mentions in the video, this allows for greater control- not just because of the point, but also because the brush holds (and releases) less water.
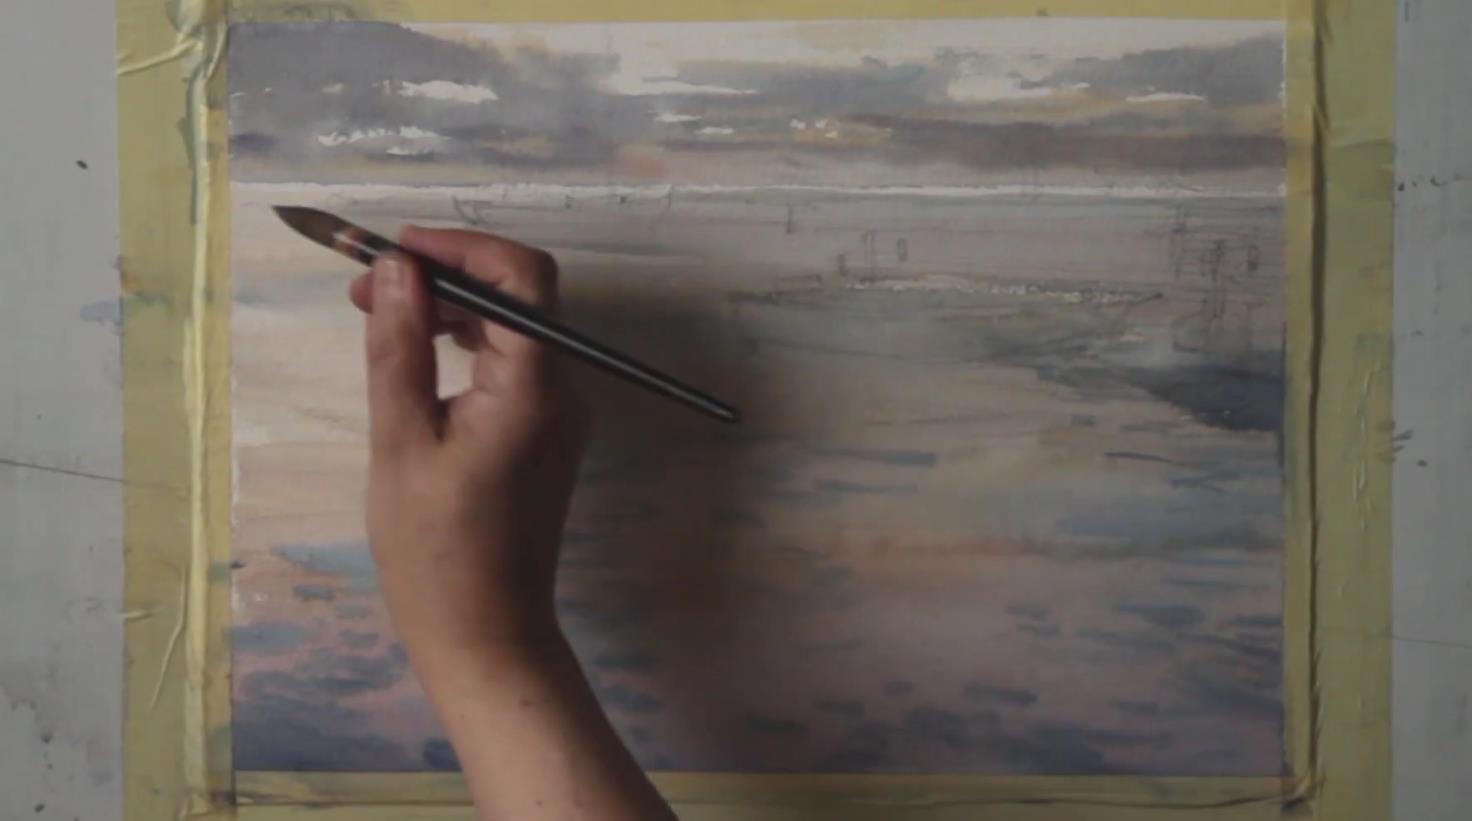
Here you can see the completed sea break in the background, as well as the darker shadows the clouds are casting on the water. What's fascinating is how the experience of that earlier first wash changes. Whereas at first it seems a bit muted and dull, once he puts the darker wash on top, the little "captured" bits of light really seem to sparkle. It's all about context. What's also interesting to note is that, as the video moves forward, it becomes clear that he's actually been preserving his darkest darks for the foreground boat and pier. So, in the context of the finished piece, these "dark" areas on the water also end up feeling much paler than they do at first, because he finishes by dropping in even darker darks at his focal point.

Here's the finished piece again. He spends the last 10+ minutes adding the fiddly stuff- little details and a bit of chroma here and there, some gouache highlights, masts, etc. For the 4-8$, the video is well worth a watch. There's far more to learn than I cover in the review. If you like his approach, you should check out his blog, his other vimeo videos, or the workshop he's giving at MISA.
