Plein Air Setups, pt. 1- Manufactured Options
Being asked about my plein air setup is one of the most repeated in-person questions I get asked. Back in 2014, I actually did a post on my own handmade setup, and although it's useful as a starting point, I'll admit it's a bit outdated. I'm going to do a follow-up post to share the changes I've made, but today I want to share what seem like the best manufactured options I know of. It's a kind of logistical hump new painters have to get over, and it can seem very nebulous and alien. You can't go to your local Target and pick one up or try it out. Not many people even use them. What are the options? What's been well reviewed? What are the pros and cons of each one?
So, what are my criteria? The setup should be well made, easy to use as a watercolorist, and as compact and light weight as possible. That's the gist of it. Now, there are lots of options out there that I won't be going into in this post (the Coulter Easel system or the Guerilla Painter boxes or the Soltek Portable Easel or the American Journey Field Easels, for example) but that's mostly because they're designed for oils and acrylics. Oil painters often paint vertically, bringing their painting closer to them, and therefore they have lots of room in front of their tripod to put their stuff. Oil painters also need more space to mix, and cleanup is harder. All of this means they often have deep, heavy wooden shelves that have folding doors. Watercolorists often paint flat or sllightly tilted, and, IMO, the space between ourselves and our painting has to shrink as we're often working slightly "over" it. This makes deep, bulky shelves very unergonomic. They're also needlessly heavy, given our requirements. All of this means I haven't included any of those setups, because they don't fit (as I see it) our needs as watercolorists.
None of the options I've included are particularly cheap, and you are sometimes limited by the design choices of the manufacturer, but they are easy to get ahold of and they work well. If you're not a do-it-yourselfer and the simple logistics of equipment is what is holding you back from playing with paint outdoors, then this post may be of particular use to you. Of course, I've also seen people just paint on their lap in a chair, so... it's not like an easel is required to make marks! ;P
The All-in-One Approach-
If you're looking for a complete system, where all the parts as sold together, these are the two best options.


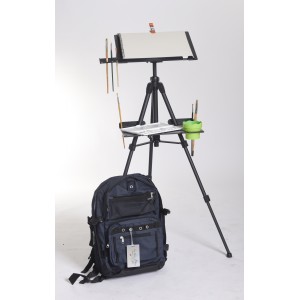
I've painted a few times with other painters who have this setup. It seems completely reasonable. Despite a number of limitations which I'll go in to, if you're looking for something well made, all-inclusive, and easy to use, for the best price... then this is my top recommendation.
Pros- It's relatively lightweight, fits in a backpack that is provided, and it allows you to use 1/4 sheet pieces of paper easily. Larger paintings need their own backing though, and have to be attached to the easel in some way. Your shelf is provided for you and although they cut a whole in it for the water cup (is that a good thing or a bad thing?) you can bring your own palette and set things up as you wish. The even include a little travel palette if you don't have one yet. The tripod is lightweight and sturdy. You just buy it and go paint. An additional plus? It's also available on Amazon, if that's of value to you.
Cons- You have to use the provided tripod and shelf together, as the shelf is not adjustable. If you use it with a different tripod, the openings where the shelf latches on to it might not fit. It's designed to go only with this tripod. The slide out shelf with holes in it for your brushes seems like a gimmick I would not use, nor would I hang my water bucket so close to my paper, as shown in the photo. The hole cut into the shelf for the water cup only goes where they suggest it should go, instead of where you might want it to be. But, its easy to buy, set up, and use. Not to be overstated.
Price- Around 160$.


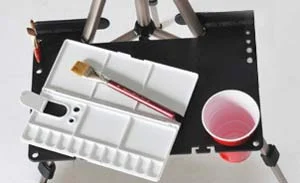
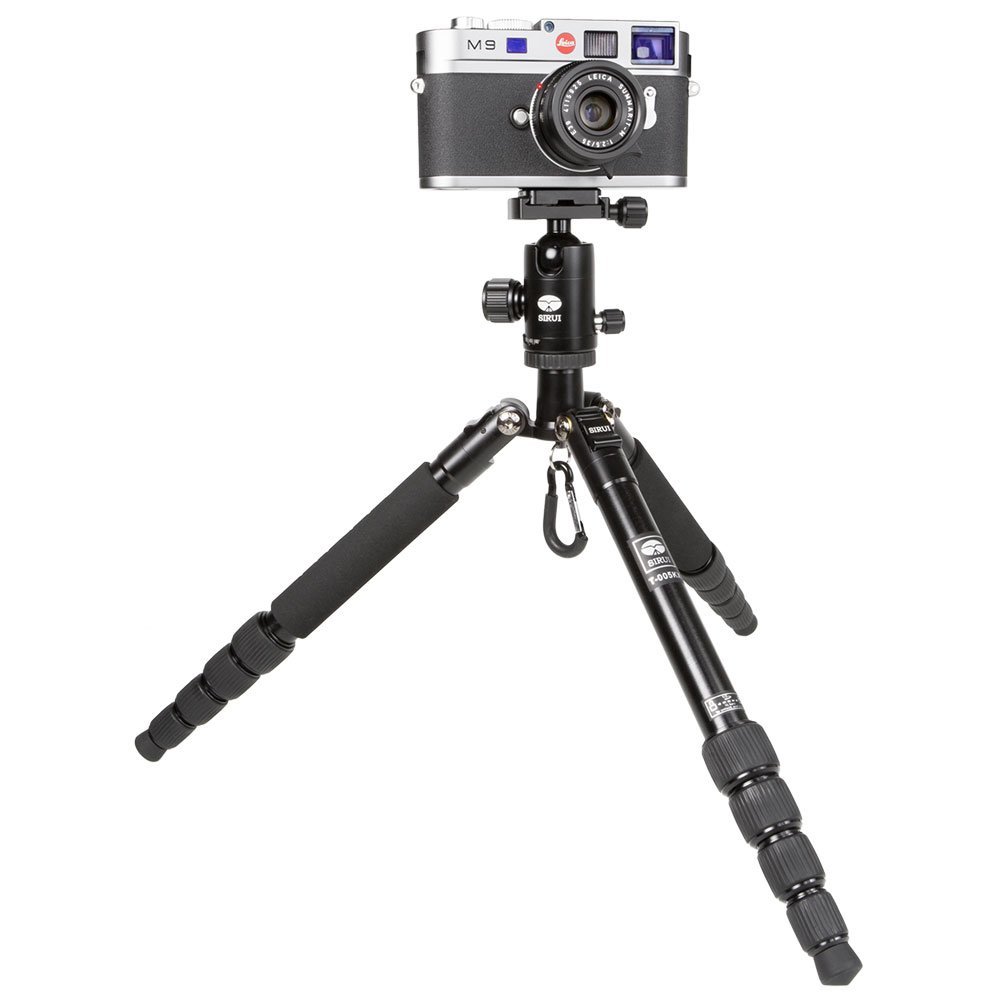
This one has also been repeatedly recommended in wetcanvas threads. I've seen someone paint with the canvas holder, which was a nice option, but he didn't use the shelf, as far as I could tell. They say on the website that the little black boxes are not included, so I'm assuming it looks like the 2nd pic, where there's just a shelf.
Pros- The clear benefit, as I see it, is the extendable canvas holder, which allows you to use a vertical 1/2 sheet or even a full sheet (!!) if you paint horizontally. I don't know how well it's all balanced out. Still, the ability to paint bigger is nice. It includes a tripod, shelf, and tripod mount. Additionally, this Sun-Eden Tripod (versus the En Plein Air Pro Sun-Eden tripod) has a ball head. This allows for full 360 degree tilting and rotation, which can be helpful at times. As a combo, this makes the canvas very mobile on this setup.
Cons- It's 60$ more expensive than the En Plein Air Pro Traveler, but it doesn't include a backpack. If you've already got a big enough backpack though, then that won't really matter. In which case, the flexible mount and 360-degree ball mount may be worth the extra cost.
Price- It costs around 225$. If you just want to use the extendable tripod mount, it runs 100$. I've definitely thought of doing so, as it's a neat piece of kit!
The Piecemeal Approach-
Sometimes you already have a tripod, or want to use a piece of this or that system. You really only need three things-
1) a tripod,
2) a shelf that attaches to the tripod, and
3) a mount for your backing to attach to the tripod's quick release.
It's actually relatively to make the mount that attaches to the quick release on the tripod (where you backing attaches to the tripod), but making the shelving is actually mildly complicated. Lots of cuts with precise measurements and fiddling about. If you're looking for info on these little "pieces" of a complete system, this section is intended to help you.
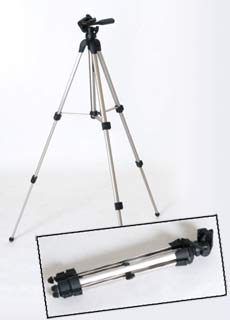
Pros- This was my first tripod from a few years ago. It goes with the En Plein Air Pro stuff. So you can get it and add the shelf if you want. It's also cheap and lightweight, but sturdy.
Cons- A little big. And the head is not a ball mount, so it tilts but doesn't have a full range of motion. It's adequate and cheap, but not the best option.
Price- 20$ on Amazon. 40$ on Plein Air Pro's website.

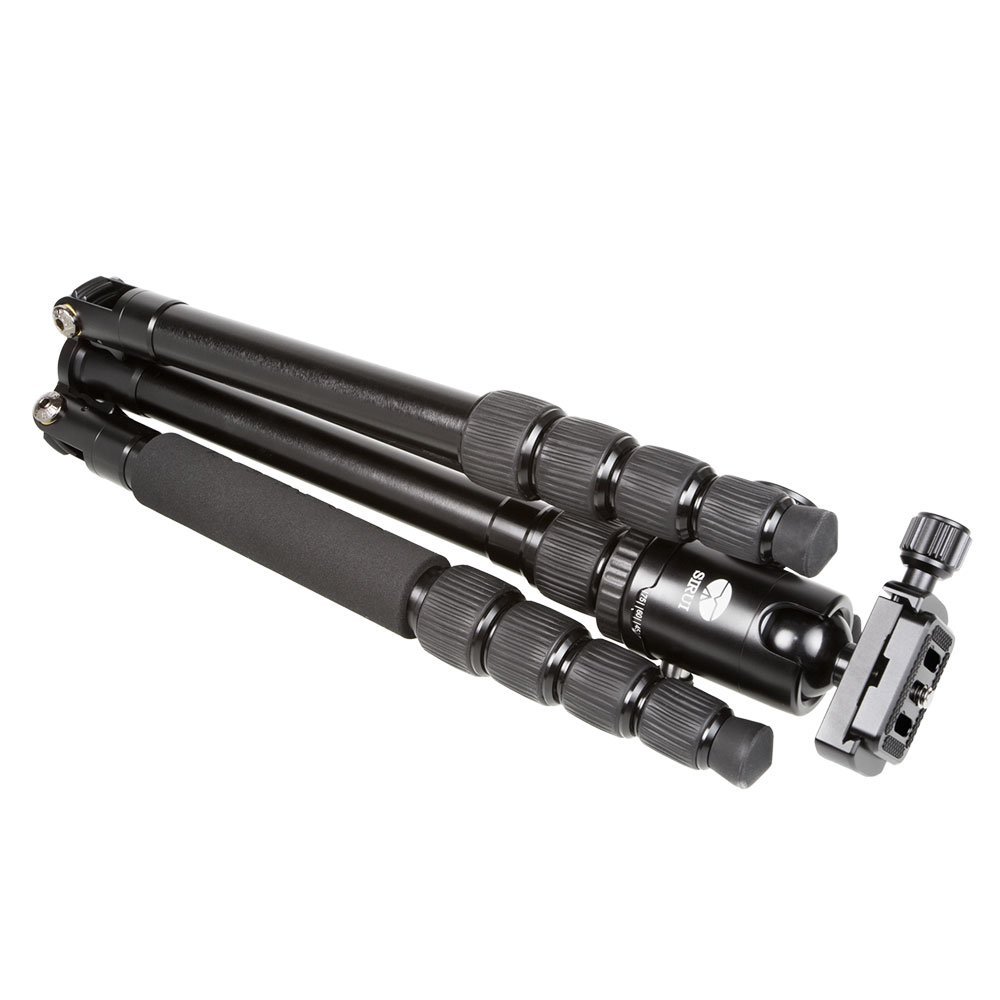
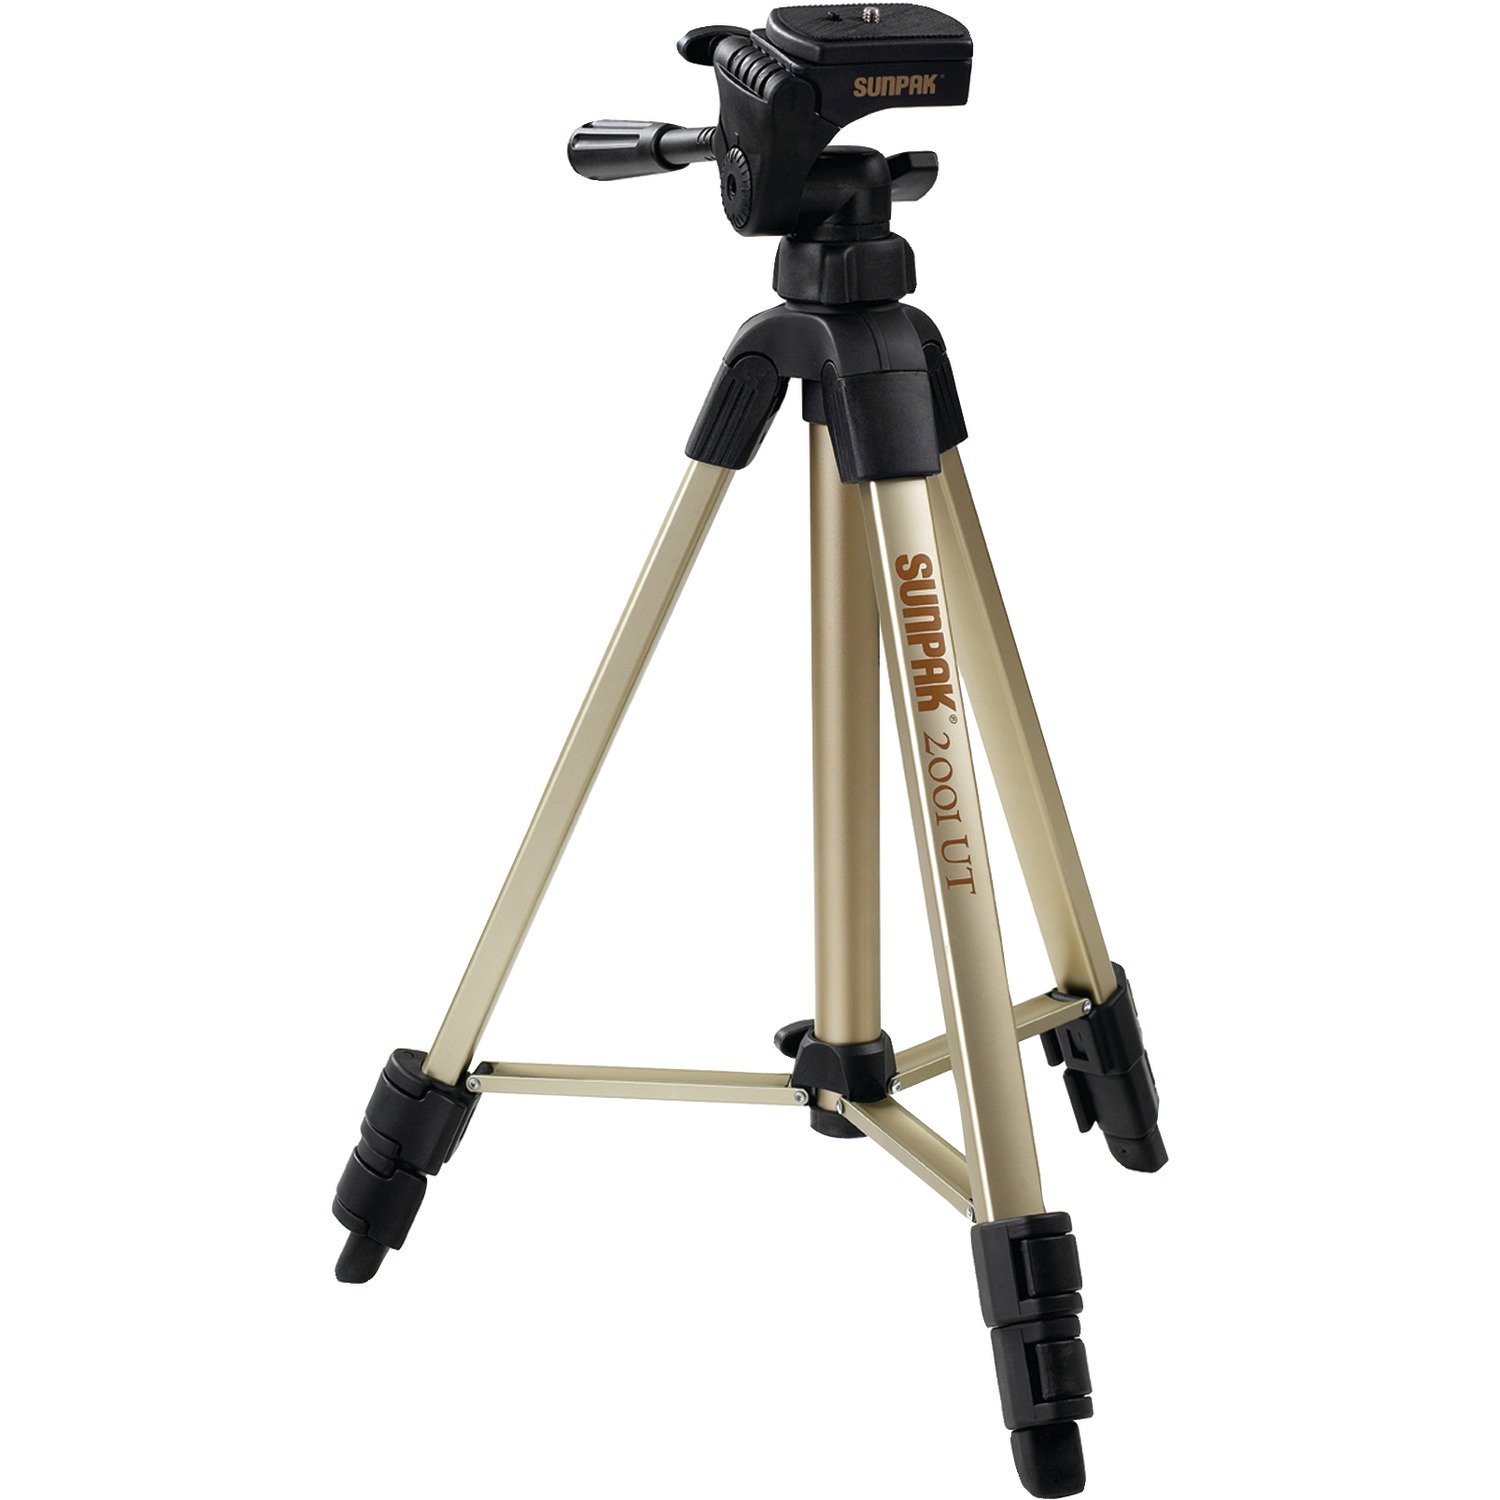
This is the tripod I currently use, which was based on the recommendation of the Marc Taro Holmes, who runs the website Citizen Sketcher.
Pros- Very lightweight and well made, with a ball mount for a full 360-degree rotation. If you remove the neck, it folds down to about 12". Very small.
Cons- It costs more. But that's about it.
Price- 120$
En Plein Air Pro Traveler Tripod Shelf
Yep, you can just buy the shelf on its own.

Pros- Lightweight and durable and cheap for what it does. Assuming you've got the right tripod, it's very very easy to use.
Cons- I imagine it only works on Sunpak tripods because the opening slots are cut to specific size. If you have a tripod with narrower legs, you'll need to modify the sections that go behind the legs and hold the shelf in space. Ifyou're game for that, this isn't a bad choice.
Cost- 40$


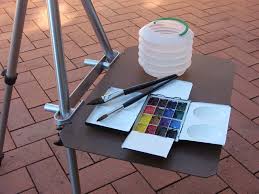
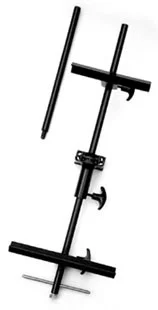
Pros- I've not used this, but user reviews in threads on wetcanvas indicate folks are happy with it. The design creatively allows for flexibility, allowing it to be used on different tripods that have different leg diameters. You can even do two different shelves at different heights on the same tripod. The shelf in the 3rd pic is not included, but the good news is you can add one on yourself, and that the shape is therefore flexible. If you've already got a photography tripod and are looking for a cheap way to add a shelf to try out plein air painting, this is the best manufactured choice.
Cons- As the shelf is not directly attached to the butler, I would imagine your shelf might shift or tip if it's much wider than the support rods- particularly if you put something heavy (like water) on the outside edge. Basically, the system has its limitations, but its easy to use!
Price- 40$
En Plein Air Pro French Insider Palette-


This is actually designed for a French Easel, but I could easily imagine using this in conjunction with an Easel Butler if you were so inclined.
Pros- With its flip out drawers it's wide laterally but narrow front to back. The front pull out drawer is retractable, so it should all fit in a backpack easily.
Cons- For a shelf, it's pricey. Of course, it offers much more than a small sheet of thin plywood. It's also thicker, at 1.5" thick. But it's the best fold out shelf that seems to be sold on its own.
Price- 90$
Much like a giraffe of a water buffalo, I've never seen one in real life, but they're supposed to be pretty neat. When I asked for recommendations, users liked it and recommended it.

Pros- I could imagine buying one of these if you've already got a tripod but it doesn't have a ball mount. With the Twister, you could get a full 360-degrees of mobile tilting options. It also supports backings for up to full sheets, so it can get quite big.
Cons- It's pretty pricey. You could buy a different tripod with a ball mount for the same amount, and make a mount for your paper. But if you're not the handy type, this is the best option to augment an existing tripod to give you more flexibility.
Price- 120$

If you're looking for a way to use an existing tripod with a quick-release, this plate is one of the ways to get from the tripod to whatever surface you're going to use to mount your paper on to.
Pros- It's sturdy and made of metal, and allows you to mount whatever you want on top of it. From the description, if has a screw to attach it to a normal quick release tripod mount.
Cons- It looks heavy for what it does, but it's made out of aluminium, so perhaps it's lighter than I think it is. There are cheaper do-it-yourself options, but this is the best pre-made one. It still requires some extra hands-on work though, after the fact.
Price- 15$
I'll share about my own setup, and the various plein air setup I've seen from other painters, in the next couple of posts. Making your own set up can be very cheap like my own first one was (50$!), but it can also add up over time, as you get things "just right" (150$-250$). I will say that making things yourself does provide a lot of flexibility. You can make it just right for you- which is nice! :)